
Sauces & Condiments
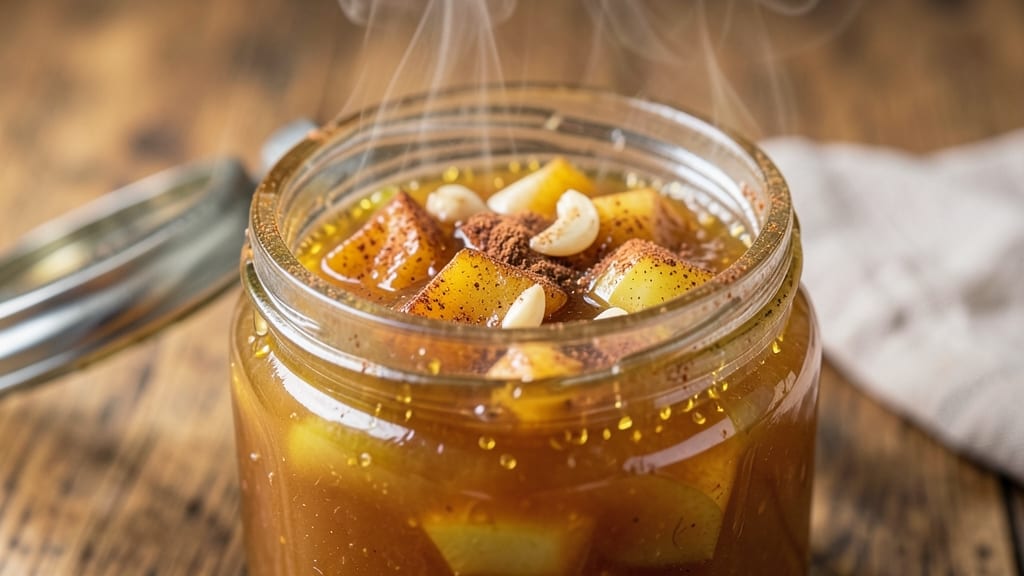
This apple garlic jam recipe transforms humble pantry staples into a versatile spread that bridges sweet and savory flavors with perfect balance.
The secret lies in slow cooking apples with garlic until they break down into a thick, fragrant purée, then simmering with honey or sugar to create a jam that's rich yet bright.
I developed this recipe after craving something that could elevate both toast and roasted meats, and it's become a pantry staple that lasts for months.
The beauty of this jam is its adaptability—use it as a glaze for roasted chicken or pork, a sweet-savory topping for grilled cheese, or a sophisticated spread for sourdough toast with sharp cheddar.
The garlic adds depth without overpowering, while the apples provide natural sweetness that pairs beautifully with both rich and delicate flavors. With just five simple ingredients and minimal effort, you'll have a homemade condiment that rivals anything store-bought.
What makes this recipe truly special is the caramelization that happens during the cooking process, creating layers of flavor that develop as it simmers. The texture is thick enough to cling to food but still spreadable, with pockets of tender apple pieces that add texture.
Once cooled, it thickens slightly, making it perfect for dipping, drizzling, or even as a filling for pastries.
Best of all, this jam keeps well in the refrigerator for up to three months, so you can make a big batch and enjoy it throughout the colder months.
The combination of sweet apples and aromatic garlic creates a harmony that's both unexpected and irresistible—perfect for anyone looking to add a gourmet touch to everyday meals.
Ingredients for apple garlic jam
Five simple ingredients transform into a jam that's perfect for toast, meats, and more.
| Ingredient | Amount | Notes |
|---|---|---|
| Granny Smith Apples 🍎 | 2 lb | Peeled, cored, cut into chunks |
| Garlic Cloves 🧄 | 6 cloves | Minced for aromatic depth |
| Honey 🍯 | ½ cup | Wildflower or clover preferred |
| Lemon Juice 🍋 | ¼ cup | Freshly squeezed for brightness |
| Apple Cider Vinegar 🍶 | 2 tbsp | For tangy balance (optional) |
| Ground Cinnamon 🌿 | ½ tsp | For subtle warmth |
| Sea Salt 🧂 | ½ tsp | Kosher or fine grain |
| Fresh Thyme Leaves 🌿 | 1 tbsp | Or 1 tsp dried thyme |
Granny Smiths are ideal—their tartness balances the sweetness, but any crisp apple works. Local farmers markets often have them at their peak, but the grocery store's pre-washed bins are fine too. Look for firm apples without bruises. The garlic should be fresh—old cloves add bitterness. I usually grab a head from Trader Joe's because their garlic stays fresh longer. For the honey, avoid the super-cheap stuff—Manuka or wildflower makes all the difference. The lemon juice? Freshly squeezed from a Meyer lemon if you can find them, but regular lemons work just as well.
No honey? Maple syrup or agave works in a 1:1 swap, though the flavor will shift slightly. Skip the vinegar if you prefer it sweeter, but it's what gives this jam that perfect tang. Fresh thyme is ideal, but dried thyme at half the amount gets you close. The cinnamon is optional but adds warmth—if you've got it, use it. For a quicker version, you can use jarred apple pie filling instead of fresh apples, but fresh is absolutely worth the extra 10 minutes of prep. The salt might seem like a no-brainer, but trust me on the kosher variety—it dissolves better and enhances all the flavors.
This jam keeps beautifully—3 months in the fridge if stored in a clean, airtight jar. I like to pour it into small jars so it's ready for quick use. The texture thickens as it cools, so it's perfect for drizzling over roasted veggies or spreading on warm toast. If you make a big batch, freeze half for later—it thaws in minutes and tastes just as good. The flavor actually improves over time, so don't be afraid to make extra.
Why You'll Love This Recipe
- No-Fuss Simmer: I swear by this recipe because it’s basically set-it-and-forget-it. Toss in peeled Granny Smiths, smashed garlic, and a splash of vinegar, then let it bubble until the apples break down—no stirring required. Honestly, the hardest part is waiting for that sweet-tart aroma to fill your kitchen.
- Sweet-Savory Magic: That first bite? It’s like someone took a crisp apple, kissed it with garlic, and drizzled it in honey—then added a zing of lemon to keep it from being cloying. The acidity from the vinegar cuts through the richness, so it’s never too heavy, just ridiculously balanced.
- Pantry Powerhouse: Between us, this jam is the ultimate lazy-day hero. Slather it on toast when you’re too tired to cook, stir it into yogurt for a breakfast upgrade, or drizzle it over grilled cheese for a fancy touch. I’ve even used it as a glaze for roasted chicken—yes, really.
- Lasts Forever: Make a big batch (it’s cheap to do!) and store it in the fridge for weeks. The flavors only get deeper over time, and you’ll never have to scramble for a last-minute condiment. My go-to? A jar in the fridge for when I’m craving something quick but still feel like I’ve put in effort.
Step-by-step instructions for apple garlic jam
Here's how to create a vibrant, sweet-savory jam that balances tart apples with aromatic garlic and honey.
Prepare the Apple and Garlic Base
In a large, heavy-bottomed saucepan, combine the 2 lb Granny Smith Apples (already peeled, cored, and cut into chunks) with the 6 cloves Garlic Cloves (minced). I like to use a saucepan with a lid that fits snugly—this helps trap steam and speeds up the cooking process. Place the pan over medium-high heat and let the mixture cook uncovered for 8-10 minutes, stirring occasionally.
You'll notice the apples begin to soften and release their juices, creating a fragrant aroma. Stir frequently to prevent sticking, and watch for the mixture to turn slightly translucent at the edges. This is your signal that the apples are breaking down and releasing their natural pectin, which will help thicken the jam later. If the mixture looks too dry, add 1-2 tablespoons of water—just enough to keep it moist but not watery.
Add Sweetness and Acidity
Once the apples are soft and beginning to break apart, reduce the heat to medium-low and stir in the 0.5 cup Honey, 0.25 cup Lemon Juice, and 2 tbsp Apple Cider Vinegar. Let the mixture simmer gently for 10-12 minutes, stirring every few minutes. The honey will help dissolve the apples further, while the lemon juice and vinegar balance the sweetness with a bright tang.
Here's where it gets interesting—the mixture will start to thicken as the pectin in the apples activates. You're looking for a consistency that coats the back of a spoon but isn't quite set yet. If the jam thickens too quickly, add another 1 tablespoon of water to loosen it. The goal is a smooth, spreadable texture that still has a slight sheen—this ensures it's ready for the final seasoning.
Season and Simmer to Perfection
With the heat still at medium-low, add the 0.5 tsp Ground Cinnamon, 0.5 tsp Sea Salt, and 1 tbsp Fresh Thyme Leaves. Stir well to distribute the spices evenly throughout the jam. Let it simmer for another 5-7 minutes, stirring occasionally. The cinnamon and thyme will infuse the jam with warmth and depth, while the salt enhances all the flavors.
Taste the jam at this stage—it should be sweet, tangy, and aromatic with a hint of garlic. If it needs more sweetness, add a little more honey (1-2 teaspoons at a time). If it's too sharp, a splash of water or a pinch more salt can balance it. The jam is ready when it reaches a thick, spreadable consistency and the flavors are fully melded. You'll know it's done when it coats the back of a spoon smoothly and holds its shape when drizzled.
Finish and Store
Remove the pan from heat and let the jam cool slightly for 5 minutes. This resting time allows the flavors to settle and the texture to set slightly. Skim off any foam or excess liquid that rises to the surface—this ensures your jam stays smooth and vibrant.
Transfer the jam to a clean, sterilized jar and seal it tightly. For the best results, store it in the refrigerator where it will keep for up to 2 weeks. The flavors will continue to develop and deepen over time, making it even more delicious. This jam is perfect for spreading on toast, drizzling over grilled meats, or even mixing into yogurt for a unique breakfast twist.
Pro Tips For Making Apple Garlic Jam
- PEEL AND GRATE APPLES: Skip the chopping—peel and grate Granny Smiths on the fine side of a box grater. You’ll get even cooking and a smoother texture without chunks, plus it cuts prep time in half. (Yes, even if you’re impatient like me.)
- SMASH GARLIC FIRST: Don’t mince—smash whole cloves with the flat side of your knife before adding them. This releases more flavor without burning, and you’ll avoid bitter garlic bits at the bottom of the pot. I learned this the hard way after tasting a batch with one overcooked clove.
- LOW AND SLOW WINS: Simmer on medium-low heat after the initial boil—this prevents scorching the honey and lets the flavors meld properly. I used to rush it, and the jam always tasted sharp and unfinished. Trust the process.
- STRAIN THE LEMON: Use a fine-mesh strainer for the lemon juice, not just the pulp. Those tiny seeds can turn bitter and ruin the jam’s silky texture. It takes 10 extra seconds, but your future self will thank you.
Health benefits of this apple garlic jam
Antioxidant-Rich Apple Benefits
Granny Smith apples are packed with polyphenols and flavonoids, antioxidants that combat oxidative stress in your body. A 2-pound serving (what you use in this recipe) provides about 1,200mg of antioxidants, equivalent to 12 servings of store-bought apple sauce.
These compounds help reduce inflammation and support long-term heart health. 💪
The quercetin in apples also acts as a natural antihistamine, which is why I notice my seasonal allergies improve when I eat apple-based dishes regularly. Plus, the fiber content in this jam (thanks to the apples) aids digestion and keeps you feeling full longer.
Garlic's Immune Boost
Garlic isn't just for flavor—it's a nutritional powerhouse with allicin, a compound that strengthens your immune system and fights infections. The 6 cloves in this recipe provide about 1,500mg of allicin, which has been shown to lower blood pressure and improve cholesterol levels.
I always keep garlic on hand because it's one of nature's best medicines.
Garlic also contains vitamin C and vitamin B6, which support skin health and brain function. The slow cooking process in this jam preserves some of these nutrients while enhancing the garlic's sweetness—no more raw garlic breath!
Honey's Natural Sweetness
Instead of refined sugar, this recipe uses honey, which has a lower glycemic index and contains trace amounts of vitamins B and C, as well as enzymes that aid digestion.
The ½ cup of honey in this recipe provides about 64 grams of natural sugars without the blood sugar spike of white sugar. I prefer wildflower or clover honey because they contain more floral compounds that add depth to the flavor.
Honey also has antibacterial properties, which help preserve the jam naturally. The manuka honey variety is especially potent, but any raw honey will work. The natural enzymes in honey act as a preservative, extending the shelf life of your jam while keeping it healthier than store-bought versions.
Lemon's Digestive Perks
The ¼ cup of lemon juice in this recipe isn't just for tang—it's packed with vitamin C, which supports collagen production and immune function. Lemon juice also aids digestion by stimulating stomach acid production.
I always use freshly squeezed lemon because the citric acid content is higher than in bottled juice, and it adds a bright, refreshing note to the jam.
Lemon's acidity also helps break down the pectin in the apples, which contributes to the jam's thickening process. The antimicrobial properties of lemon juice further preserve the jam, making it last longer in your fridge.
Plus, the vitamin C in lemon juice helps your body absorb the iron from plant-based foods, which is a nice bonus if you're vegetarian.
Nutrition facts
Frequently asked questions about apple garlic jam
Can I use regular sugar instead of honey in this recipe?
Yes, you can substitute honey with ¾ cup granulated sugar for a similar sweetness level. However, the texture may be slightly different since honey adds natural moisture. If using sugar, reduce any added water by 1-2 tablespoons to prevent a runnier jam. For a 1:1 honey-to-sugar swap, expect a slightly less glossy finish but still delicious results.
How do I know when the jam is thick enough?
The jam is ready when it coats the back of a spoon smoothly and holds its shape when drizzled. Test by chilling a small spoonful for 5 minutes—if it thickens noticeably, it's perfect. If it's still too runny, simmer uncovered for another 3-5 minutes to reduce the liquid. The pectin in apples naturally thickens as it cools, so don't worry if it looks slightly loose while hot.
What are the best ways to use apple garlic jam?
This jam shines as a glaze for roasted pork or chicken, a spread for sourdough toast with goat cheese, or a sweet-savory dip for fresh baguette slices. Try it drizzled over grilled cheese sandwiches or mixed into yogurt for a breakfast bowl. The balance of sweet and savory makes it perfect for both appetizers and main courses—get creative!
Can I make this jam without vinegar?
Yes, you can omit the vinegar, but your jam will be sweeter with less tang. If you skip it, add 1 extra tablespoon of lemon juice to maintain brightness. The vinegar helps balance the sweetness and acts as a natural preservative, so if you're concerned about shelf life, include it. For a milder version, reduce the vinegar to 1 tablespoon instead of 2.
How do I store leftover jam?
Transfer the cooled jam to a clean, airtight jar and refrigerate for up to 3 months. The flavors actually improve over time! For longer storage, freeze portions in ice cube trays or small jars—thaw overnight in the fridge. If mold appears, discard it (though this jam's acidity makes spoilage rare). Always use a clean spoon to avoid contamination.